Cyanotype - Method:
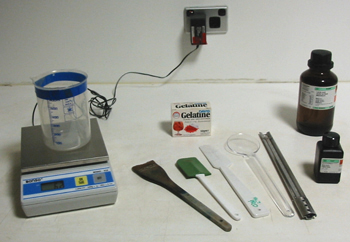
- Mixing the Chemicals
Step 1.
When you are ready
to coat your paper, combine equal amounts of solutions A and B under
subdued light such as a red or yellow safe light. For optimum results,
try to mix about the amount needed during one day. |
 |
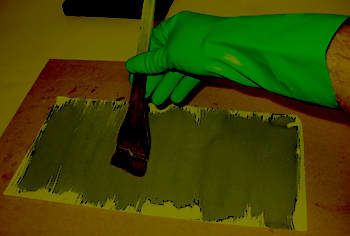
Step 2.
Brush the mixed
emulsion on the paper or other surface taking care to apply the coating
reasonably thickly as possible but not so thickly that it would drip
when hung to dry. It is important that a brush is used without a metal
ferrule as this will contaminate the mixture. More info on applying the emulsion. |
|
If
you have to use a metal ferrule make sure that you only dip the
end of the brush in the mixture, the metal ferrule can also be
covered with plastic tape. While they are more expensive, brushes
can also be obtained that have a stainless steel ferrule and these
seem to have no effect on the mixture.
|
 |
Additional coating information:
While the emulsion is sitting, the chemicals
can tend to separate out at different levels in the liquid so just before
you coat the paper give it a stir.
Use gloves and other protective equipment
Applying the emulsion too thickly can
create a situation where the top layer of the emulsion becomes dark
on exposure and blocks the light from reaching the lower layer, so that
in the developing stage both layers wash away.
Experiment with emulsion thickness -
Experiment with application techniques,
foam brushes can be used, foam rollers can give and even coating.
Aberrations can be incorporated as part
of the work.
Be aware that some papers are fragile
and may need taped down to a board for coating and processing, also
some papers may need sizing to stop the emulsion soaking into the fibres
of the paper.
Step 3.
Dry the paper in darkness or subdued light
and keep in darkness until use. If you are coating a great number of
sheets a drying rack is ideal, but be careful that there is no wet emulsion
or contaminants on the rack where you place the paper.
A hair dryer can be used to speed the
drying up. Some manuals recommend using the sensitized paper with in
12 hrs. I once forgot about some paper in this state and used it after
about 3 weeks without any great difference. This did not seem to effect
the sensitivity: The only effect was that the tonal quality might have
been a little softer.
3. Place the paper in a light tight drier,
or hang up to dry in darkness. Once dry it is best to use the prepared
paper within 12 hours. 4. Expose the sensitized paper to sunlight with
the negative laid in contact on top of the emulsion and a thick piece
of glass on top to give better contact. (For perfect contact, a more
sophisticated means of achieving this are discussed in various books
on the subject). The exact exposure time will vary with sunlight conditions
and experiments might be necessary to obtain good results, in bright
sun the time will be about 20 mins. Finished exposure is indicated when
the image appears to be one stop over exposed. 5. Develop under subdued
white light in a try of running water until all yellow races from the
sensitizing solution have disappeared. For a more intense blue dissolve
a few drops of Hydrochloric Acid in the wash tray before inserting paper,
or after development in water, soak in a tray of water with a few drops
of ammonia for a about 5-10 seconds 6. Wash paper for another 10mins
in running water and dry either by hanging up or tacking to a board
with gummed tape. The later will avoid curling up but the print will
need to be carefully cut out from the gummed surround with a sharp blade.
While it is best to wipe all surfaces when the chemical mixture is wet,
any marks left by the emulsion on working surfaces that have dried can
be cleaned up relatively easily with water.