Converting colour digital images to Black
and white
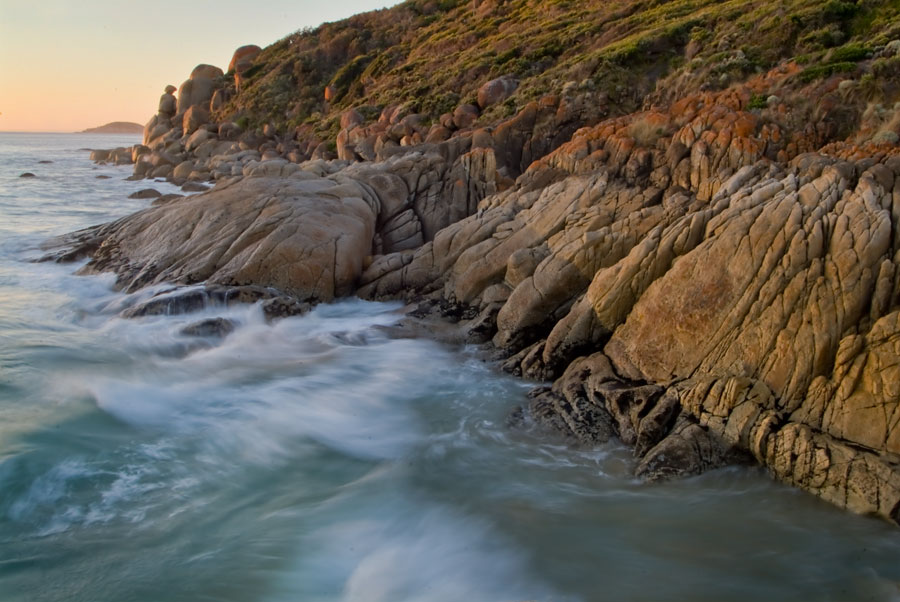
Although most images shot with a digital camera are in colour, some subjects suit the graphic and tonal qualities of black and white. Most digital cameras have a setting that allows you to shoot the images in black and white. While this gives an instant effect, the camera software is processing and converting the the colour information in a manner that might not give the most effective results, and muchtonal control is lost.
Shooting the subject in colour and later converting the colour information to Black and White in photoshop allows of far more tonal and contrast control - if layers are used, it can also be done in a way where the colour information is also retained.
Converting to Black and White in photoshop
Destructive editing - quick and easy - but not the best!
Lets have a look at various ways to convert this colour image to black and white in photoshop.
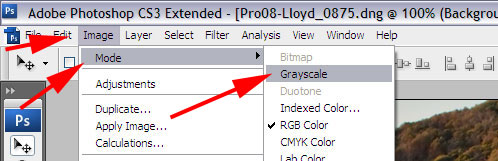
The easiest way is to change the mode - click on image - mode - then grey scale. However because information is destroyed this is what is termed as Destructive editing. It is like crashing the gears in a car. This sequence shows how to do it.
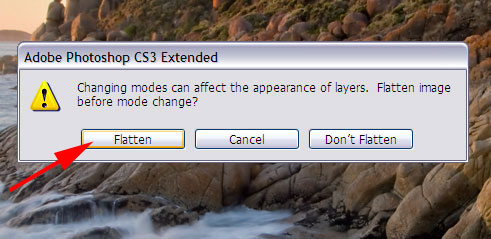
If you have any layers in use you will get a dialogue box like this - Often Photoshop will warn you about changes that might take place.
Click on Flatten
Next another box will come up that allows you to discard the colour information - but it is also a warning that there is also another way of controlling the adjustment.
Mouse over to view original image
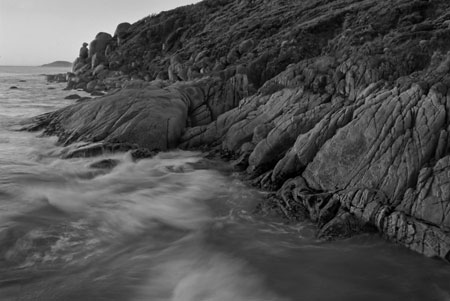
If you click OK you will have an image that looks like this.If we then save the file the colour information is lost . In some ways this is similar to selecting black and white in the camera when shooting.
Non Destructive editing - editing with more control
As suggested by Photoshop, lets look at how we can convert the colour image using the image adjustment settings, that will give more control and still retain the colour information as well..
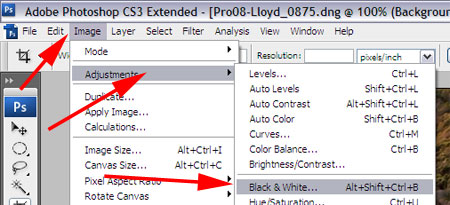
When you have your image open on the desk top - you can click Image - Adjustments - Black & White
while this will allow us control over the tonal range within the image it will not allow us to turn it on and off.
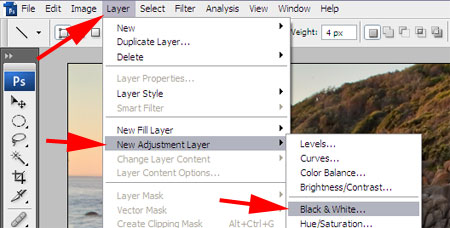
However, if we select Layer - New Adjustment Layer - Black & White, we can do the sam adjustments in a layer that we can turn on and off as we please.
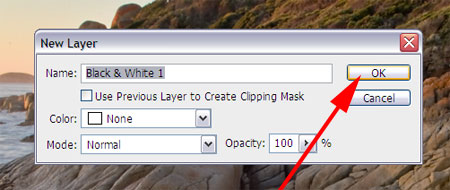
Click OK to bring this up
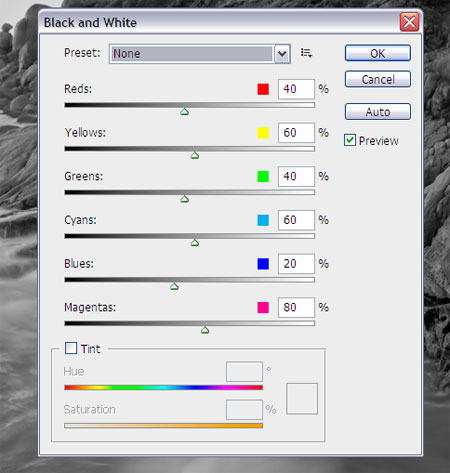
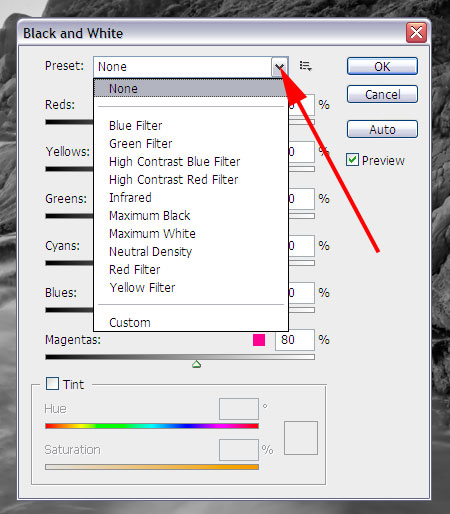
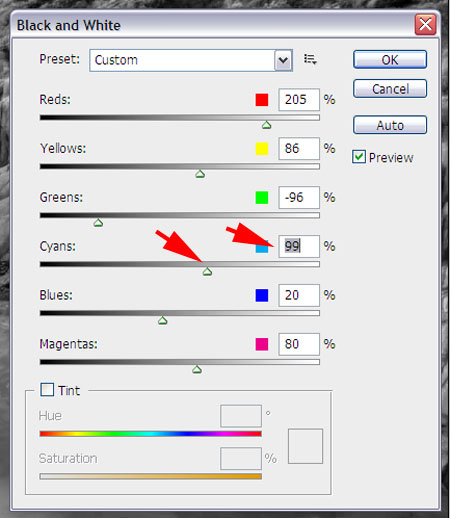
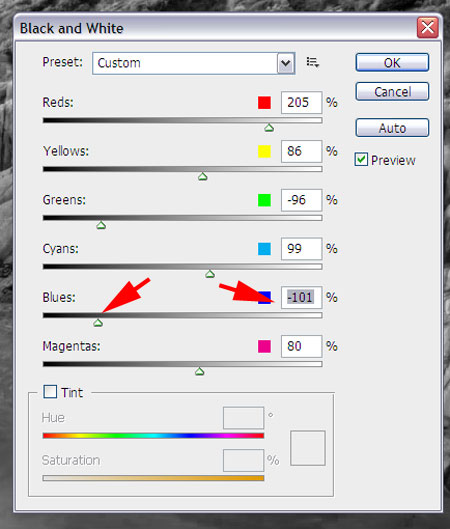
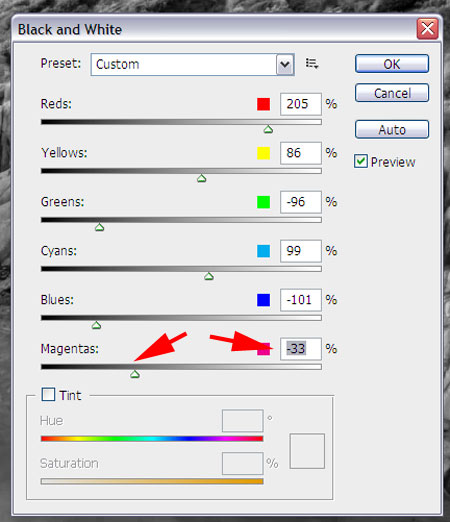
You will see a dialogue box like this. Notice that we are able to select the tonal density or darkness of 6 colours.
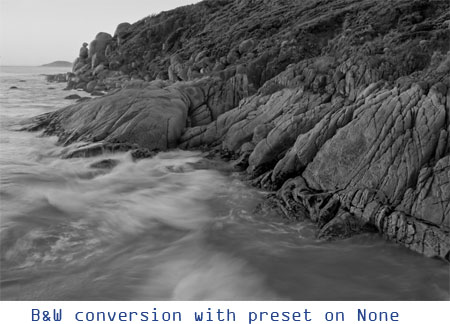
Here we se the preset None is on - but we could chose any of the filters. This would give a similar result to placing a filter of this colour over the camera lens with Black & White film.
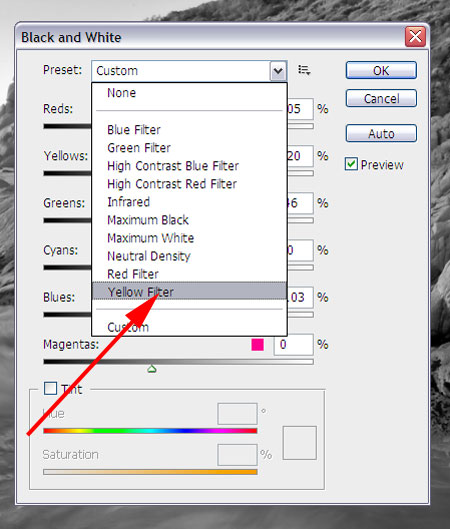
Here the Yellow Filter is selected
Mouse over to view roll over image
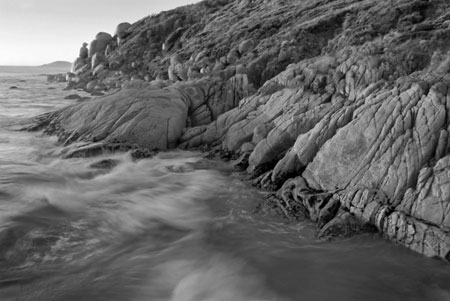
Here we see the result of the black & white adjustment with the yellow filter.
Mouse over to view the difference in basic B&W conversion through - image - mode - B&W and the new adjustment.
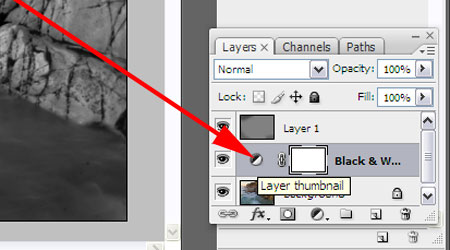
However, if we save the image with the layer, at anytime we can open the image click on the layer thumbnail icon and the same filter adjustment box will open.
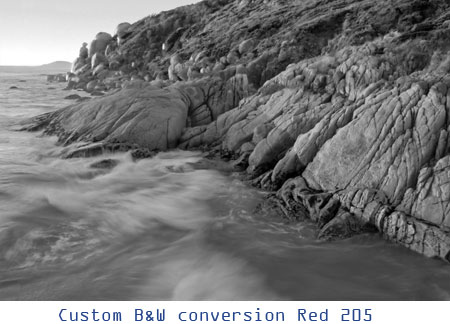
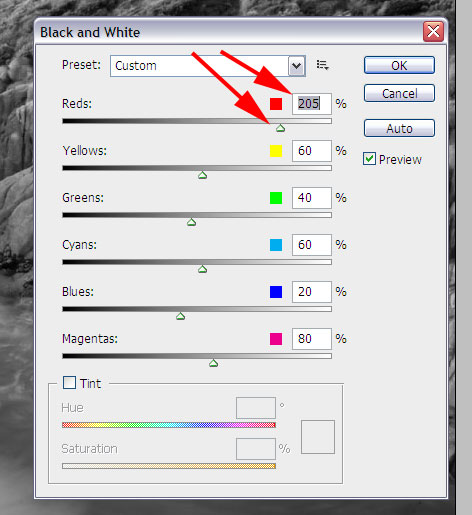
We can set each of the filters independently - Notice how this adjustment lightens the reds.
Mouse over to view the original colour image
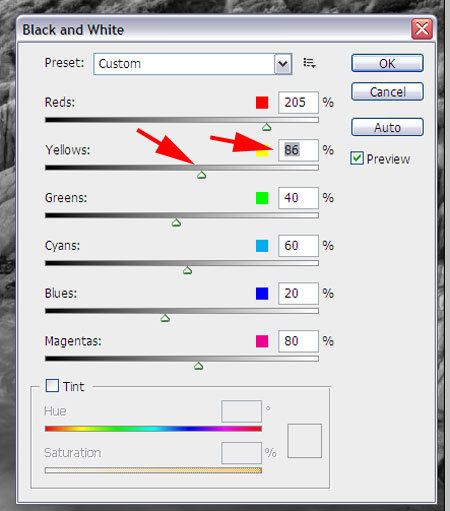
Here we see the effect with the yellow and red filter levels set. Notice how this adjustment lightens the yellows.
Mouse over to view the original colour image
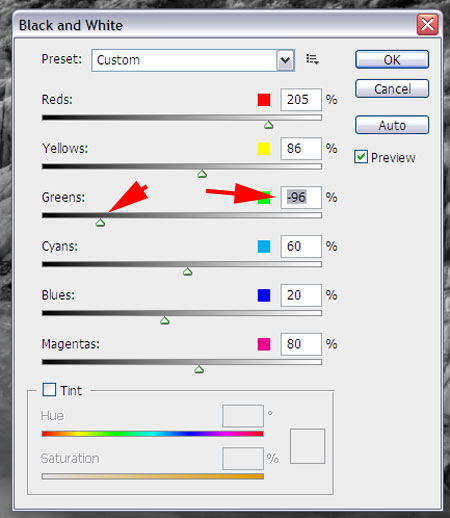
Here we see the effect with the Green, Yellow and Red filter levels set. Notice how this adjustment is -96 and darkens the green in the lower right of the image.
Mouse over to view the original colour image
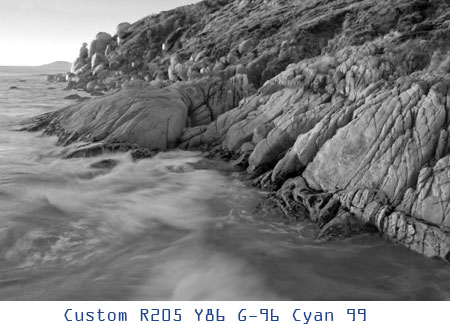
Here we see the effect with the Green, Yellow, Redand Cyan filter levels set. Notice how this adjustment lightens the Cyans in the image.
Mouse over to view the original colour image
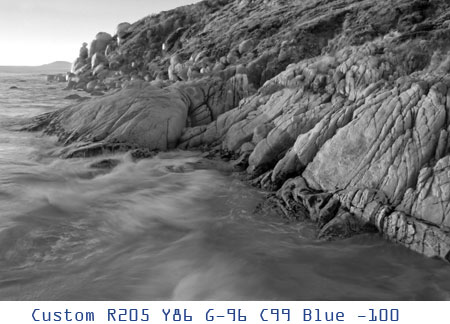
Here we see the effect with the Green, Yellow, Red, Cyan and Blue filter levels set. Notice how this adjustment darkens the Blues in the image.
Mouse over to view the original colour image
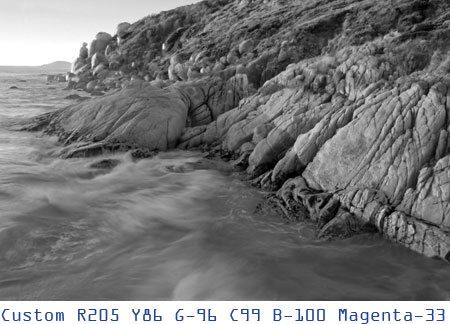
Here we see the effect with the Green, Yellow, Red, Cyan, Blue and Magenta filter levels set. Notice how this adjustment darkens the magenta in the rock on the centre left.
Mouse over to view the original colour image
Here is the image conversion through Image Mode Black and White
Here is the image conversion through the adjustments
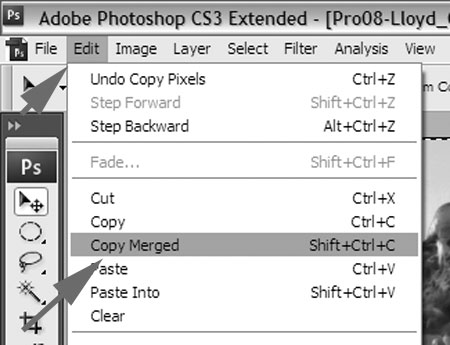
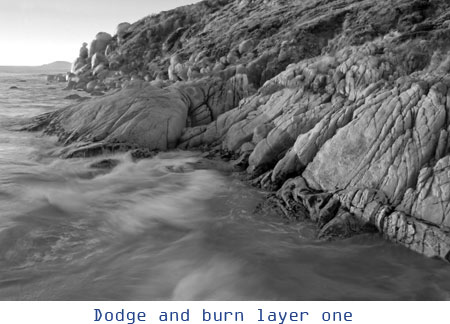
If we copy each of the layers as we adjust the filters and paste them as layers, or we could keep adding adjustment layers for each colour, we can dodge and burn or erase areas away to gain the specific aspects of each filter we would like
Here is the image with all the colour adjustments
Here we see the image with an area of the Blue filter erased to lighten the water
Here we see other sections dodged to reveal more tone in the sky Compare this with the Image Mode Black and White version opposite. Note that there has been NO dodging or burning in of the original image and much of the adjustment has been carried out through setting the colour levels.
You can also convert to Black and White through Channels or if you have CS3, SC4, SC5 you can do it in the Raw converter which is even better - but this is slightly more complex.
there is more info in the book by Dan Burkholder - Making Digital Negatives.


