Exposure tests
- Van Dyke Brown
Take the step
wedge and carry out a series of exposure tests to establish an exposure
that produces a D max ( darkest tone or black) - density while recording
as many other tones as possible. You might need to make several tests
to establish this.
|
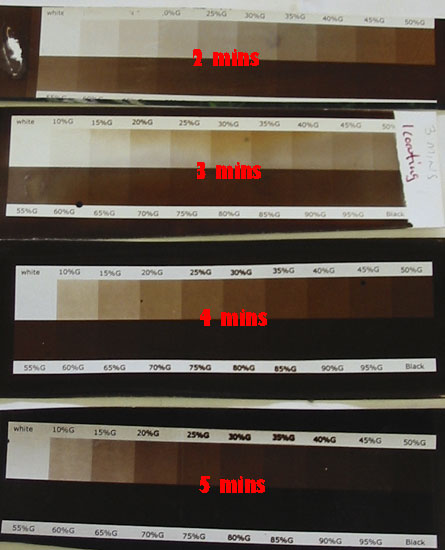
We
can see here that as the exposure is increased the tones on the
scale become denser. |
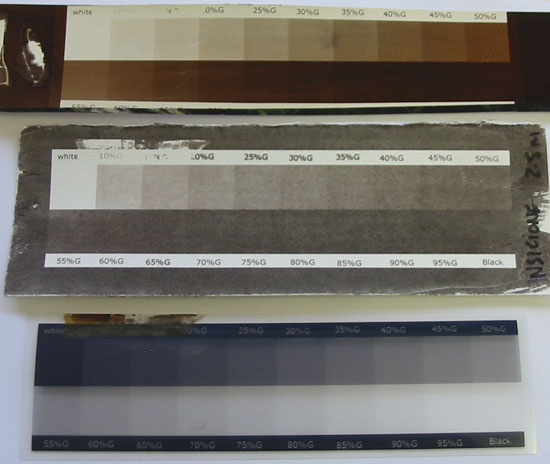 |
Take
into account that different papers and light sources will give
quite different results.
On the top
is a test on Hahnemuhle fine art paper below Arches -
the transparent
step wedge is below this.
If we look
at the top test we can see that the tone from about 80% to 100%
is blocked up and records as the same tone.
|
You will most
likely find that while the result gives a Dmax several of the adjacent
ones block up and produce the same tone as Dmax. Like wise while the
test produces a Dmin or white, several of the adjacent tones also record
as white. So if you had an image in photoshop and printed it using this
exposure some of the light tones and some of the dark tones that had
blocked up would be lost. This is because the tonal scale of the Van
Dyke emulsion is on as long as that of the scale.
So if we want
these tones to print we need to adjust the tonal scale with curves and
carry out further tests.
Mouse over
|
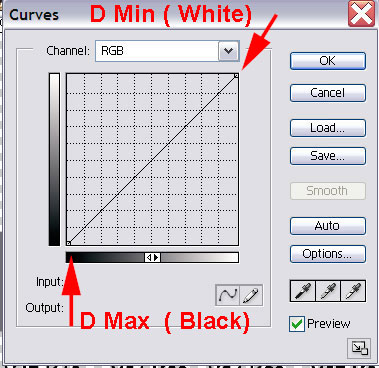
Go to - Layer
- New Adjustment Layer - Curves
This will bring
up a graph with a straight line - the lower end of the line represents
D Max or the darkest tones while D min is represented by the high
end of the graph.
Each division is
10% so what we need to do is click on the line and move the line
to draw a curve that will reference the missing tones. The steeper
the curve the greater the contrast between tones - the flatter
the curve the lower the contrast.
When we look at
the straight test, we can get a good idea of how to adjust the
curve - we need to make it steeper from DMax or black to about
80% and do the same from White to 10% the reset the points in
between to create an elegant curve that is always climbing.
We don't want the
curve to flatten out or worse go down at any point. |
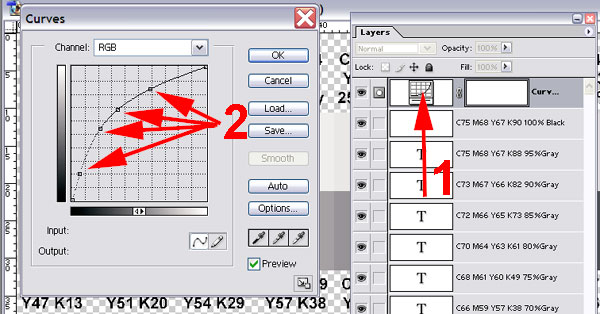 |
So
if we move the lower points on the graph so they form a steeper
angle this will give these tones more contrast. |
So the tones
on the original step wedge will look quite different than the one with
the adjustment curve.

Mouse
over to see step wedge with curve adjustment
This allows us to drop the curve into any image and it will readjust
the image to suit the tonal scale of the process.
Mouse over to see negative with curve
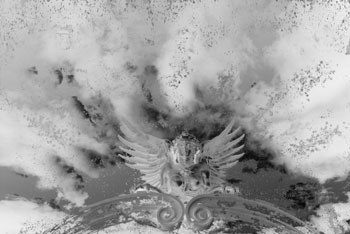
When we make a print from each negative at the exposure time we established
through the original step wedge we can see how the unadjusted image
looks over exposed.
 Mouse over
to view image made with cruve adjusted negative Mouse over
to view image made with cruve adjusted negative
|
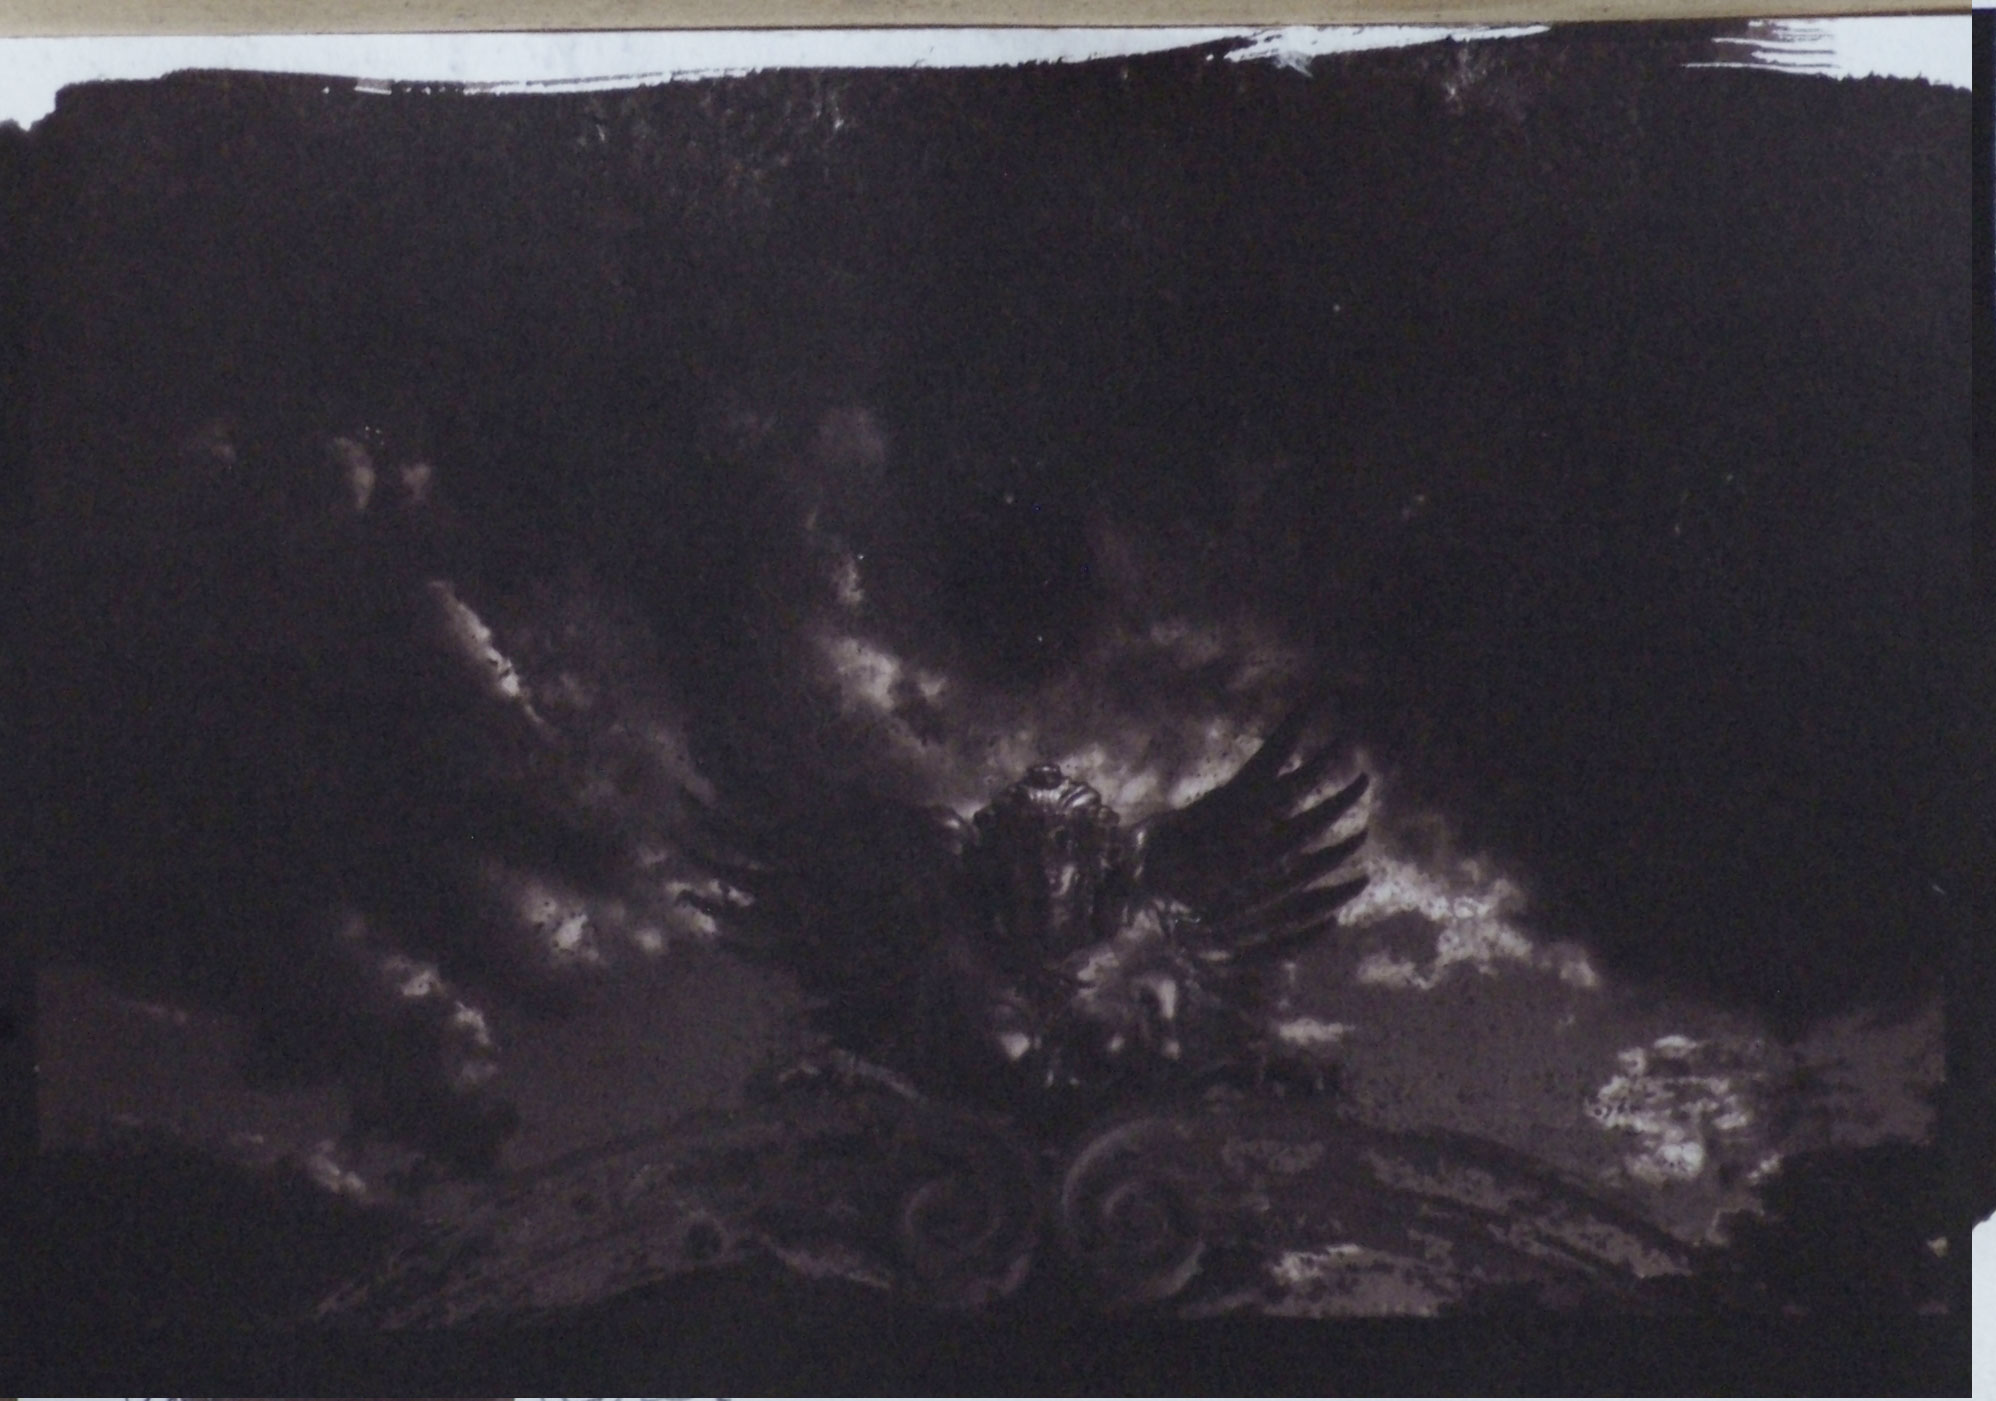
A
Van Dyke Brown print made from the original negative with no curve
adjustment. The exposure time was established with the step wedge. |
|
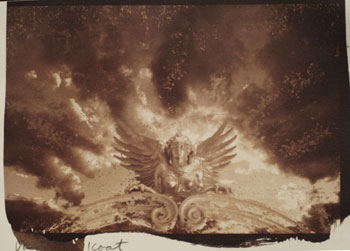
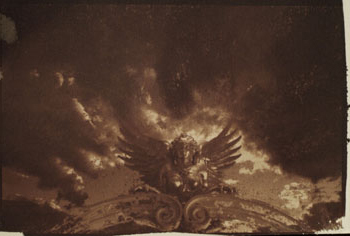
A
print made from the readjusted negative with the curve added. |
 |
|
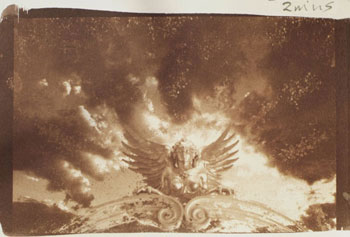 |
If
you are making prints with no curve adjustment, the tendency with
an image like this is to reduce the exposure to compensate for
the apparent over exposure, but in the process, there is a compression
of tone in both the high lights and shadows.
A Print made
from the original negative with no readjusted curve but a reduced
exposure. |