 |
Sequence viewing > Light & Lighting - Resource - ©
Lloyd Godman
Light in Photography - LIGHTING - FLASH
LIGHTING - Studio
Flash Filters
PAINTING
WITH LIGHT
It
is possible to use studio flash in many different ways besides one
single light and in fact many situations require just that.
As mentioned before several units can be used together with the use
of a slave unit. If this is done, one light
is usually used a the main light and is brighter, while the others
as fill for the shadows or to high light a particular area of the
subject.
But
consider the film as a canvas that you can paint with light building
up the image as required. Instead of a white back ground as the canvas
would be, use a black back ground to create a void on which to place
the image or images. For instance, by using the studio flash with
no modeling light for the actual exposure, a series of exposures could
be made on one piece of film, perhaps of a moving subject while keeping
the shutter open. Each exposure could be triggered manually with a
different coloured filter across either the camera of the flash
light.
| PAINTING
WITH LIGHT
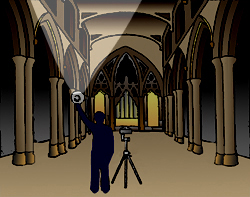
With
large areas like the interior of a building or even landscapes
the camera can be positioned on a tripod with the shutter
open as the photographer moves about within the space setting
the flash off repetitively lighting different parts of the
area. In this case the flash would be set off manually. Be careful to make sure the flash is not aimed at the camera.
The flash can be charged and fired many many times until the whole space
is illuminated evenly for the exposure of the film or CCD. Although
the photographer may be within this space they will not record
as they are constantly moving and the light is directed away
from them.
Rather than use flash, some photographers use a hand held tungsten light or even a torch light. The light is simply left on and the photographer walks around with the light on within the subject painting the space with light. Before you begin check the corners of the frame within the viewfinder to see exactly how far you have to fill with light. If it is a small open space, you might be able to work from behind the camera with out moving much at all. Begin at the top right corner and paint across to the right corner, then move your position down and aim the light back across again from right to left, until the whole area is covered. This way you will fill the shadows under furniture etc.
To achieve even illumination, try to keep the light moving at a constant speed.
If the space is larger and more complex, you will need to walk around inside he space with the light. The process does take time and needs some experimentation, but once you get a base exposure to work from you will find the results are well worth the effort.
Because the light direction from each flash within the space is different, this fills in all the shadows with soft light without any one single harsh shadow. With digital cameras you can see instantly what you have recorded – professional photographer using film sued Polaroid film to establish their exposures.
As
a variation, some photographers have photographed using this
technique and placed a range of different colored
filters over the front of the flash unit for each exposure.
Remember
the inverse square law where the
areas of the space further from the light receive less light
than those closest. In this interior example adjacent, the
ceiling areas may need 4-8 times as many flashes as the areas
where the photographer is closer to like the floor. This is why it is impossible to use an on camera flash to illuminate a sports event like the Olympics from the stand, the distance is too great and by the time the light has reached the athlete the power has diminished to the point where there is little effect.
|
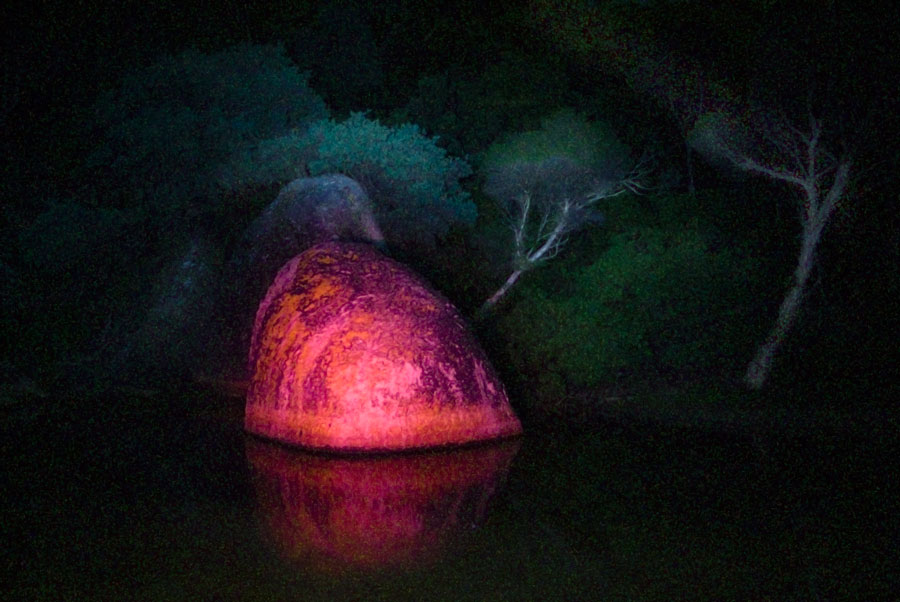
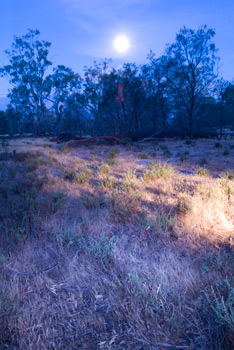
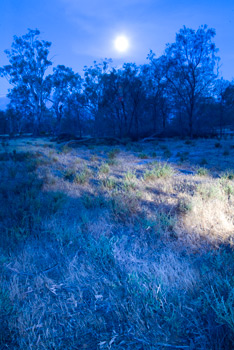
Move over image to view roll over image |
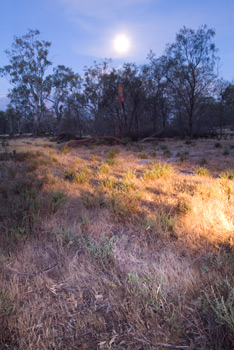
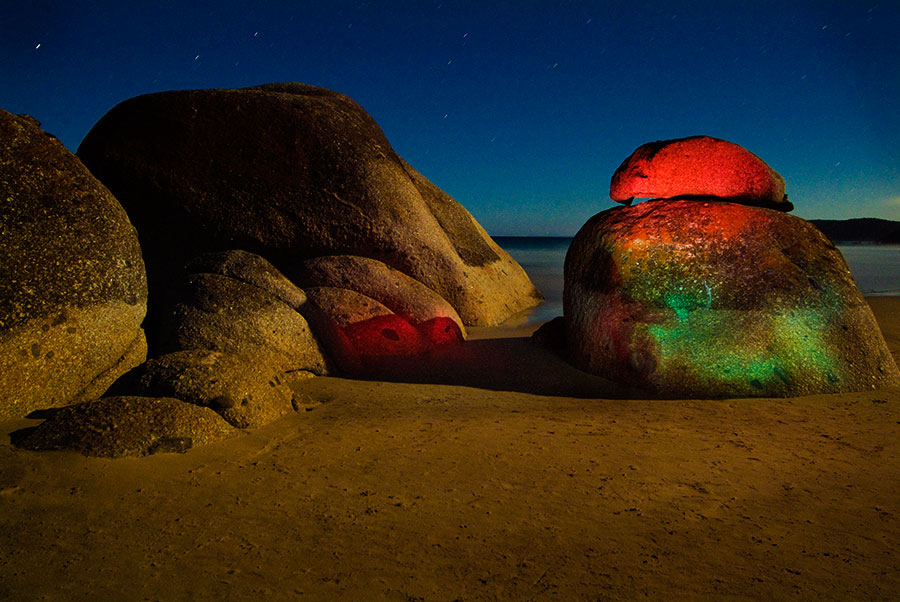
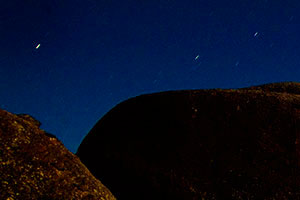
Hand held Torch light
The light painting technique can also be used in other ways - this image is an exposure of several minutes painting with different coloured filters in the moonlight - the red and green on the rock are where they have ben painted with a torch that has colour filters over the light. |
|
When using a digital camera for light painting, you will need to take account of various factors. I would suggest that you carry out many experiments, keep shooting and be open to the results.
ISO - in terms of exposure, the IS0 setting is interrelated to both shutter speed and aperture - the lower the ISO the lower the noise level in the resulting image - however the lower he ISO the longer the exposure and with some cameras this can also induce the noise level.
The higher ISo the more noise - so in some cases 1600 or higher can create an unacceptable level on noise.
The noise level is specific to the make and model of camera (or the ccd in the camera that records the information) - Carry out some experiments with your camera The Super CCD in the
Noise shows as a series of random lighter pixels interspersed amongst the other pixels that have recorded information. It is more pronounced in the darker areas of the image.
Blending 2 exposures to reduce Noise.
With many subjects its possible to take 2 exposures of the same subject and using layers in photo shop blend the two layers so as one layer fills in the noise pixels or gaps of the other layers. |
|
reciprocity factor
While a ccd or film responds with a doubling or halving of exposure in a consistent and predictable way that allows us to control the density of the exposed and developed negative, this consistency is only within certain bounds. For instance at very high exposures over 1/4000 second or at exposures longer than 1/2 or 1 second, most ccds and film do not react in the way we would expect them to. They need more exposure to create a density we would normally associate with 1 stop. This practical difference is called Reciprocity effect or Reciprocity failure, and we need to calculate how much more exposure is needed to correct for this. Again you many need to carry out some specific tests on your camera ccd or film situation.
|
|
Aperture setting
Photography is always about trading one aspect with another - and this is graphically illustrated with the aperture - stopping the aperture down to get a greater depth of field means we get a longer exposure - or opening up the aperture to gain a shorter exposure means we get less depth of field. Often we can be fixated on using a small aperture to gain maximum depth of field, However lens sharpness and depth of filed are not the same, and in terms of sharpness, most lenses are ground to perform best at a mid aperture, say f8 - so if the subject does not demand a small aperture to place all the elements in focus then look to use a wider aperture which will reduce the length of exposure.
|
|
Focal length of the lens
using a wider angle lens to achieve greater depth of field
However this also effects perspective
|
|
Colour shift with longer exposures
Use Raw |
Auto
Cloudy
Daylight
flouro
Tungsten |
Power usage
Long extended exposures use proportionately greater amounts of power. There fore exposures over 30 sec ill flatten the battery very quickly. |
|
Tripod
Socks in sand - sturdy |
|
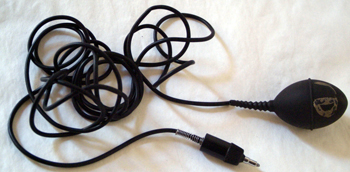
Cable release
Use a release that t can be locked for exposures greater than 30 sec etc.
For instance, this pneumatic release can not be locked - |
|
Focusing the lens
You may need to turn off the auto focus - this can often get confused in low light levels and lock the camera up so that the shutter will not release.
Manually focus - zoom the lens into the area you would like in focus and spot light it with a torch then focus. Zoom out to the required focal length. Mentally check the focus distance scale on the lens and check to see it makes sense - if the subject looks to be 10m away and the scale is reading 5m then you need to refocus.
Use live preview - Some cameras allow live preview, which means that you can zoom into an area, manually focus using the LCD screen and zoom out again.
|
|
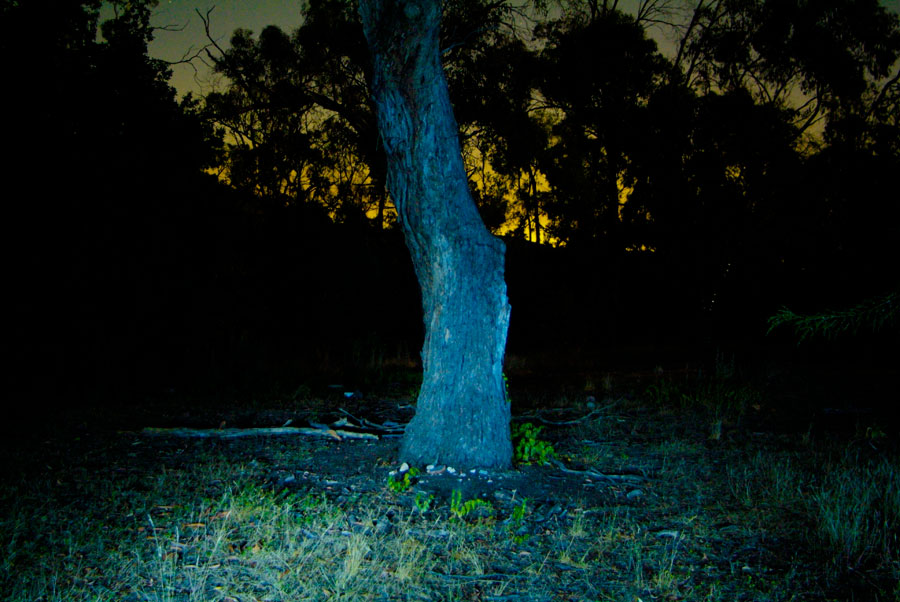
Time of night
As day turns to night the ambient light level drops and also the colour of the sky alters . By shooting through this period you will notice differences in the combinations of daylight, moonlight and painted light.
Shooting in moonlight is practical from 1/2 to full and back to half moon again.
Take into account that the moon rises about an hour later every day. |
|
Time exposures
Exposures longer that 1min will leave stars with trails - however this does not work so well with the moon -
|
|
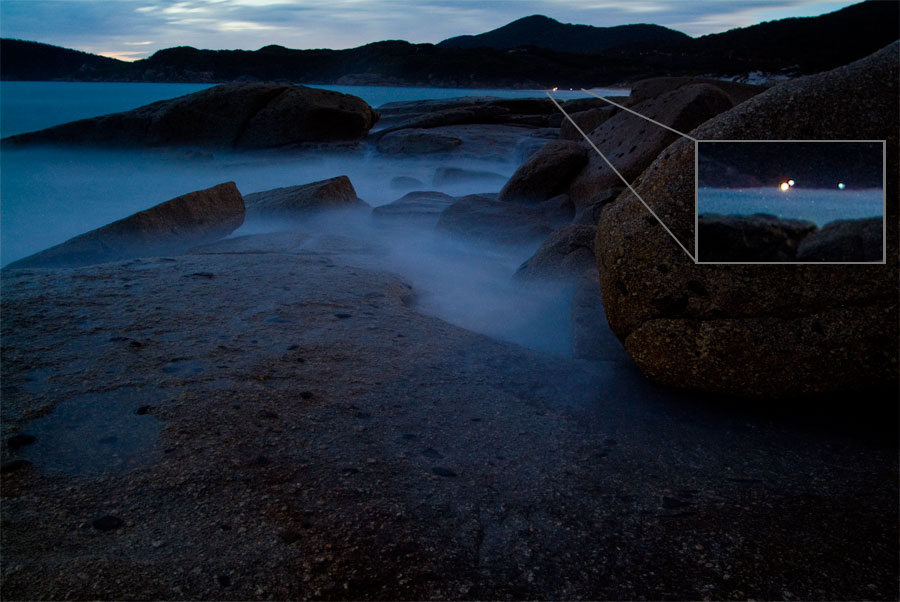
| Also look out for extraneous lights like - boats, planes, cars, houses, lighthouses, other workers. Of course while it possible to repair this with the clone tool in photoshop, with careful planning it can be possible to avoid them altogether. These aberrations can be cloned out later in photoshop. |
|
Techniques
When using long exposures, it possible to physically walk into the scene and expose and area with a torch or flash without being recorded by the camera. However, remember to keep moving through out the duration of the exposure, try to wear darker clothes. Use you body as a protective screen, keep your body between the light and the camera. If you don't want light streaks avoid aiming the light at the camera, or you could deliberately aim the light at the camera where the lights paint a light trail. |
|
On camera flash
off camera flash
Torch lights
LED
Quartz
Tungsten moonlight
Consider that the length of ambient daylight during summer is much longer than in winter - this effect is eventuated in latitudes further from the equator. |
|
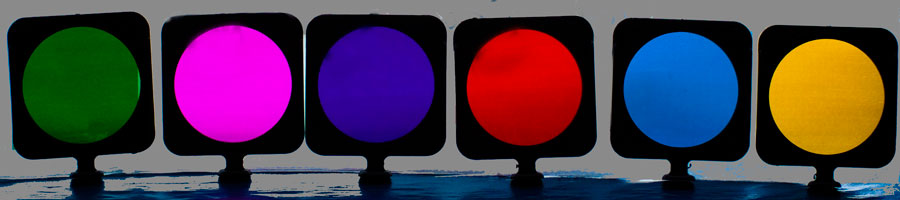
Filters
Cellophane
Gel
Perspex |
|
consider size - how to fix the filter on - This set of filters has been adapted from a set of Multi contrast filters for printing black and white enlargements |
|
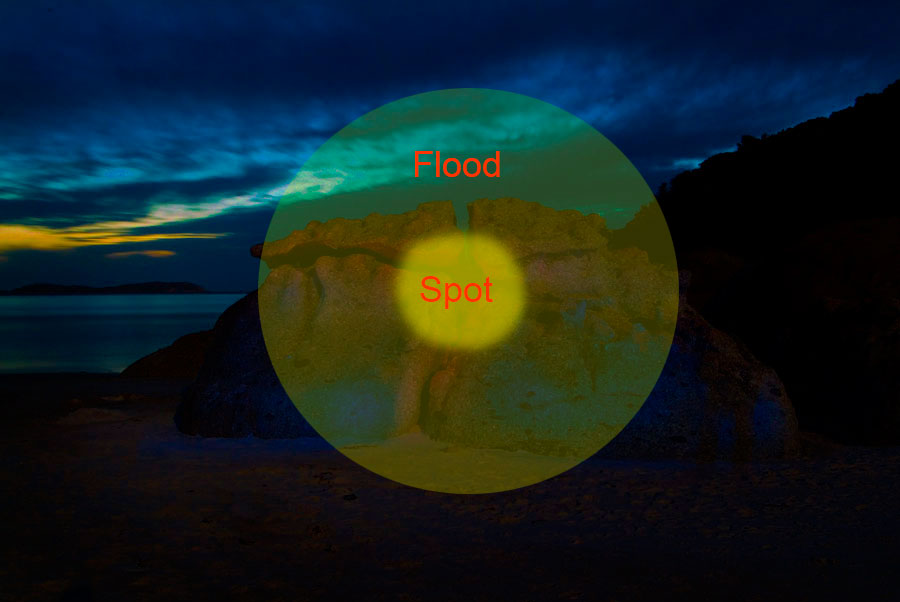
scope of beam - different torches produce wide or narrow beams of light - some produce a very concentrated spot falling off to a wider beam outside this
wide spot etc snoot
different colours need different times |
 |
Exposures
Try to get these right check histogram - to left on graph
- inverse square law |
|
Subject movement
Wind water etc |
|
Lighting ratios
Have a plan and imagine the amount and length of light need for each area.
Moon light photography
|
|
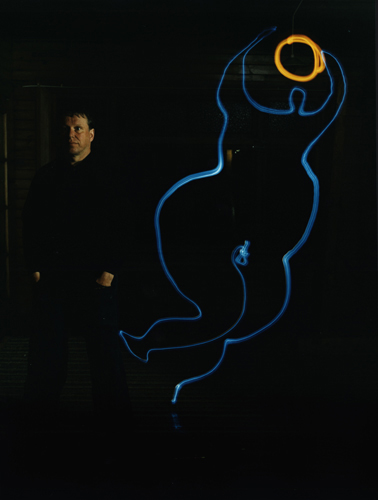
Multiple
exposures
Multiple exposures could be made exposing selected parts of
the film frame with the "information" the photographer wants
to build up on a black back ground. These separate images can
be visually separated or over lapped as the photographer requires.
With a 120 camera or a 4 X
5 format camera, an acetate sheet can be placed in the view
finder and an out line of each object photographed drawn on
it to act as a guide as to the position of the illuminated
areas of the subject for that particular exposure, so that when
the next subject is positioned in the view finder the images
can be matched almost perfectly. Between exposures, the scale
of the subject can be altered by moving closer or further away
from the subject, giving an alarming relationship between the
different subjects on the final piece of developed film while
keeping them all sharply focused on the film.
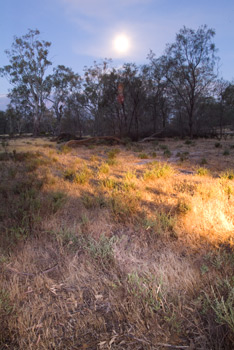
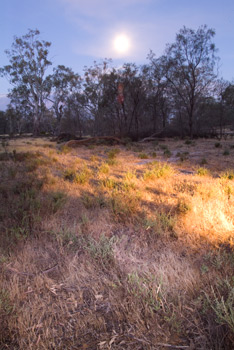
The
adjacent image was made with two separate exposures where
the scale of the body was altered between exposures. |

Move
over image to view roll over image |
Exposures
can be taken out side in daylight, and other studio images added later.
Tungsten light or filters can also be juxtaposed with day light to
create interesting effects.
Studio
flash can be supplemented with other sources of light, like
torches, projected images from slides, moon light or flames.
Want to learn more? - do a workshop or one on one with Lloyd Godman
|