Open
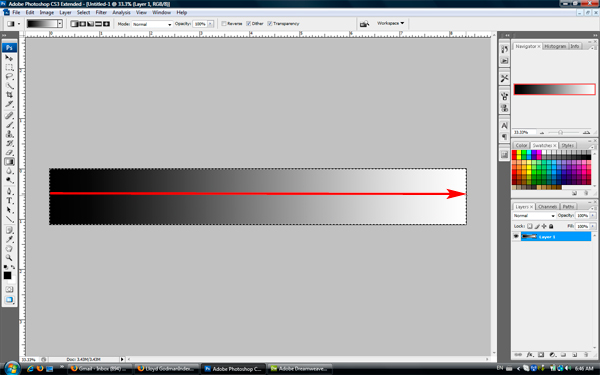
a new file in photoshop 600 Pixels wide x 300 Pixels high - 72dpi
|
|
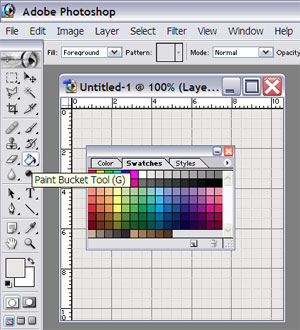
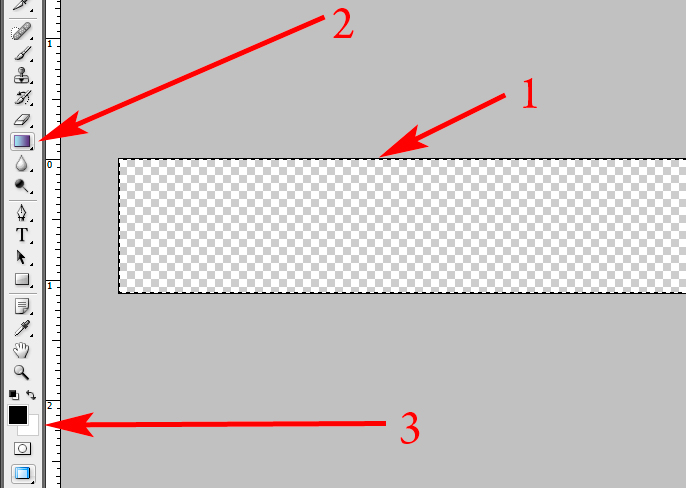
Create
another new file - lets call this IMAGE 2 -
300 x 300
Pixels and fill the area with 10% gray from the swatches using
the paint bucket tool - select the total area (control A)
|
|
and
copy ( control C) the file
and paste
it ( Control V) into the first file you made - each time you paste
the image it creates a new layer that allows you to move it etc
independently of the other layers -
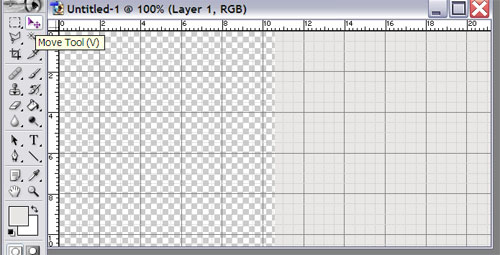
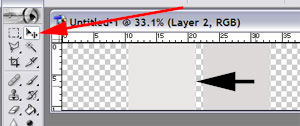
then move
the pasted layer to the right - this should give two 300 x 300
squares one white the other 10% gray. |
|
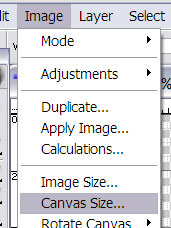
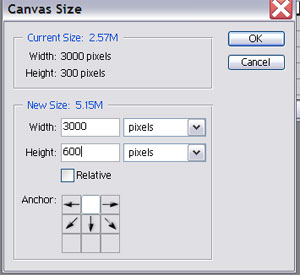
| Go
to Image - Canvas size |
|
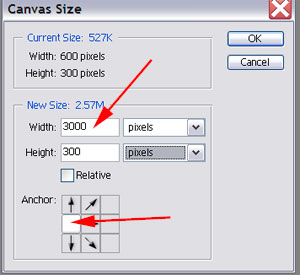
This
allows the expansion of the canvas size while leaving existing
information untouched
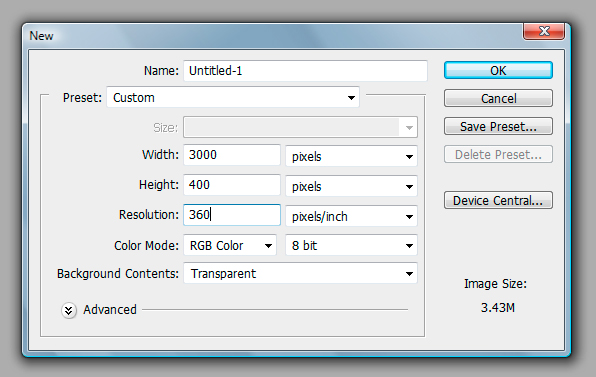
change the
width to 3000
and set
the anchor point to the centre left then click OK
this will
give a canvas large enough to past in the remaining gray tones
on the top line of the wedge to create 10 tonal steps. |
|
Continue
to paste in the the square from IMAGE 2 and using
the eye dropper select the next tone - 15% - 20% etc on the scale
and fill the area with the paint bucket tool -
Use the move
tool to position the square next to the adjacent
one |
 |
| Continue
to paste IMAGE2 and fill it with the appropriate
tone until you have a 10 tone scale from white to 50% Gray |
 |
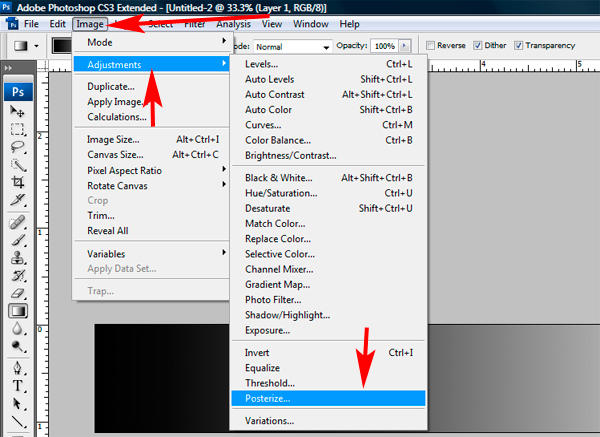
Go
to Image - Canvas size again
and alter
the height to 600
make sure
you select the top centre anchor point. This will expand the canvas
to allow the lower row of tones to be inserted |
 |
| Continue
to paste IMAGE 2 - position the layer and fill
with the appropriate tone |
 |
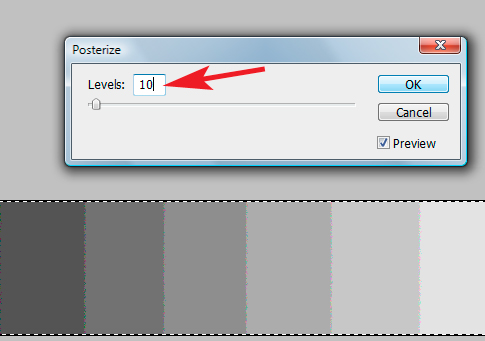
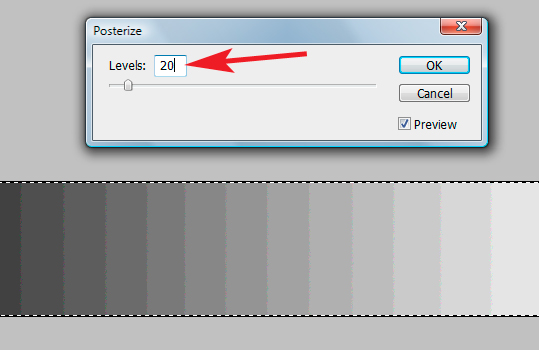
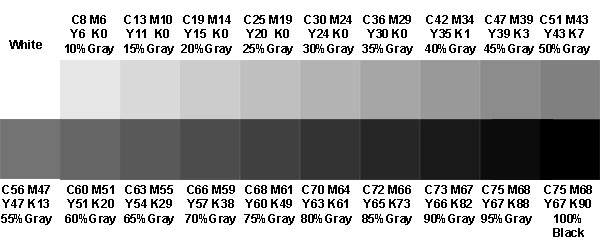
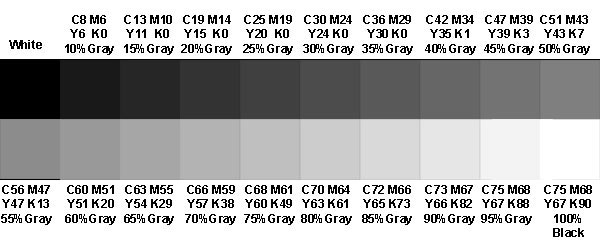
| Once
you have completed this you will have a 20 tone step wedge |
 |
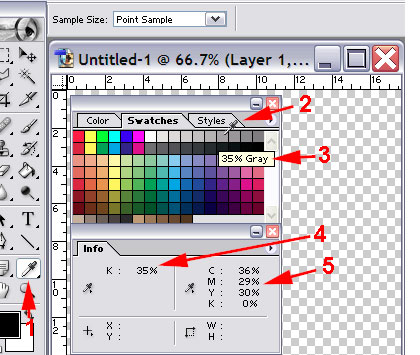
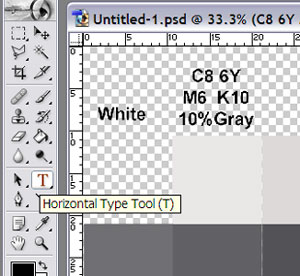
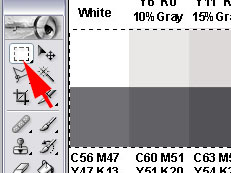
Photoshop
will give you a series of numbers or values that relate to each
tone.
When we
move the eye dropper 1 & 2 over a tone it will show a % gray
in this
case 35% gray - 3.
From widow
we can open the info box which will give a Cyan Magenta Yellow
- 5 and K - 4 - or density value for the tone you are choosing.
|
 |
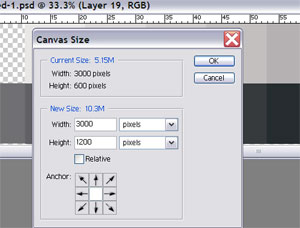
Although
not necessary, you can expand the canvas size again and using
the Text tool include this information along
side the tone. Lets make the height 1200 and keep the anchor point
in the centre. |
 |
| Place
the values above or below the tone |
 |
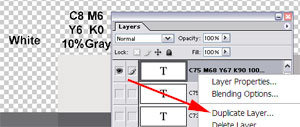
You
can simply duplicate the text layer and retype he values for each
tone |
 |
|
|

