Sequence viewing > Index - Cameras - lenses - optics - Resource - ©
Lloyd Godman
Film - Digital
Making
a PinHole Camera
Buying
a ready made pin hole camera
Professor
K's hand crafted pinhole cameras are innovative, educational,
affordable and fun! MERLIN PINHOLE CAMERAS The MERLIN paint
can pinhole cameras are versatile, rugged and ready to go...
at very affordable prices. There are two camera sizes, gallon
& quart. They offer a lot of creative flexibility for an
increasing family of pinhole photographers... students,
teachers, working artists & scientists!
Buying
a pin a ready made hole camera |
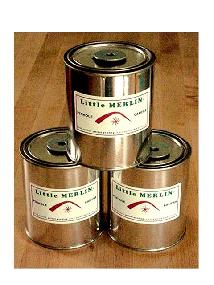
Little
MERLIN pinhole camera |
Making
a pinhole camera can be simple or as involved as you wish
to make it.
As
the box needs to be light tight but also needs to have an entry
point to insert the film finding a suitable container with
a tight fitting lid allows a photographer to make one simply and
quickly. The container does not have to rectangular as do the images.
Remember the pinhole is projecting a circular image and some photographers
working with pinhole cameras play with the fall off of light at
the edge of the circle of illumination.
Once
you have found a suitable container ( this could be a made of tin
or an opaque cardboard), use a damp cloth to clean out any dust
or other material on the inside of the container.
As
light reflections inside the camera can have an adverse effect on
the image through fogging, spray paint the inside of the box. It
is also a good idea to do both the inside and outside of the lid
as well. Do this on old newspapers or where there will be no effect
from over spray. There is an art to spray painting with aerosol
cans:
it is best to not "soak" the insides of the oatmeal box with paint.
Spray in short bursts from several inches away, and constantly shake
up the can. Use as little paint as possible because you must wait
for the paint to dry before the pinhole can be installed, and because
excess black paint can become "dust" after it dries. Dust is the
photographer's worst enemy--it causes white spots on the finished
pictures which are hard to remove.
Carefully
cut the ends off of an aluminum soft drink can. Cut a "pinhole plate",
about 2 x 3 inches in size with rounded edges, from the aluminum can. The pinhole will
be drilled in the pinhole plate.
Making
the "Pinhole Drill"
Instead
of having a glass lens like "normal" cameras, the pinhole camera
uses a tiny hole, a needle-sized hole, to form the picture inside the camera.
The best size of pinhole for this camera body is one which is 1/100th
of an inch in diameter. There is a fine needle which is that size--the #16 beading needle. Because the needle
is small and difficult to handle, it must be glued into a handle to make a "pinhole
drill." As illustrated below, the drill is easy to make, and once
prepared, it can be used to make hundreds of pinholes in the soft aluminum stock cut from soft drink cans.
Mix
the epoxy in the cut-off end cap of a soft drink can. Place epoxy
in the mouth of the clothes peg and insert the needle until it protrudes about 1/4 inch. You may
have to cut the back of the needle off to make it fit into the clothes peg If the
needle protrudes more than about a quarter inch, it will easily
break off when used to drill pinholes.
The
finished "pinhole drill" should look like this: notice the 1/4 inch
length of the drill shaft.
Here you
see the delicate task of drilling a pinhole in the aluminum plate.
This is an important part of making a pinhole camera. It requires a delicate touch and a bit of patience. A fine pinhole will
result in sharp photographs and will last for centuries! Following are the steps for using
the "pinhole drill" to make a fine-quality pinhole lens.
Drilling
the Pinhole
Hold
the aluminum plate as shown and carefully press and rotate the "pinhole
drill" until the tip of the needle barely shows through on the other side.
When
you see the tiny needle point sticking through the other side, stop
drilling. Be careful to not push too hard on the "pinhole drill"--it must not stab completely
through the aluminum on the first try.
Carefully
sand the tiny hole made by the needle's tip. Then, drill again, carefully
and slowly until the hole is a bit larger. Sand the hole again on both sides. Drill
again, sand again. It should take three or four drilling and sanding steps to get a beautiful,
round 1/100th-of-an-inch-in-diameter pinhole "lens"! Finally, clean
the hole by running water through it and patting it dry with a clean paper towel. Try not to touch the hole
because oil and dirt from your fingers may partially fill the hole
and cause it
to take less sharp pictures.
installing
the Pinhole and Shutter
Installing
the pinhole into the box camera body.
Before
placing the pinhole plate inside the camera body, put electrical tape
on two sides and make a circle of epoxy glue around the pinhole, without getting any
glue on the hole itself.
Then
carefully place the pinhole plate inside the camera so that the pinhole
is in the middle of the cut-out opening. Press the pinhole plate inside the camera for a few
minutes, until the epoxy glue thickens. A tight seal around the pinhole plate prevents
any light from leaking into the camera. The other place where light
likes to leak into the camera is around the lid.
Making
the Shutter...
From
a file folder, measure and cut out two strips, 1 inch by 7 inches
each. These strips will become the shutter guides. Cut two 10-inch strips of electrical tape
and stick them over the shutter guides, leaving about 1 1/2 inches of tape overhanging
each end of the shutter guides.
The
shutter is made from two parts. Cut a 1 1/2 x 2 inch piece from the
file folder. Also cut from either the file folder or from heavier cardboard (such as a
breakfast cereal box) a strip 3/4 x 5 inches long. Fold the strip
in half, then bend out the two "legs" as above, put a spot of glue inside the handle and wrap electrical tape around
it. Finally, glue the shutter handle onto the shutter slide. Hold the shutter handle down
until the glue hardens. The result: a pinhole shutter!
Place
the shutter guides on the camera and align them over the pinhole box.
Stick them down gently at first because adjustments will become necessary to allow
the shutter to slide easily. Unstick one end of the shutter guides and insert the
shutter. Re-align the shutter guides as necessary to allow the shutter
to slide easily (but not too easily!) while uncovering and covering the pinhole. Ready for the last step?
Slide
the shutter open and, with an inkpen, make a visible mark above and
below the pinhole. These marks allow you to line up the pinhole shutter's handle directly over the pinhole. This makes the
shutter handle an aiming device which will be useful when you take pictures with your
new pinhole camera.
Finished!
Notice
the shutter handle sticking out from where the pinhole is located
beneath the
mark on the shutter guide. The smiling Quaker now is gagged; only
his friendly eyes remain visible. This completes building the pinhole camera. Now
it is time to set up a darkroom. Pinhole cameras must be loaded with
film in a darkroom, and the pictures
taken with them can only be developed in a darkroom. The drugstore
wouldn't know what to do with film exposed in an oatmeal-box pinhole camera: this is a do-it-yourself process. Also,
be sure to remember to strap on the lid with a pair of rubber
bands before going outside into the bright sun. Most light leaks come
from the camera lid.
Want to learn more? - do a workshop or one on one with Lloyd Godman
|